
This guide walks you through connecting your domain to your Strikingly site.
- If you're connecting a subdomain that doesn't start with "www.", such as “mysubdomain.mydomain.com”, please visit Connecting Subdomains to Your Strikingly Site.
- You can send this tutorial to your registrar’s support team if you need assistance. Or, contact us anytime for additional help.
Catalog
- Step 1: Connect to Your Custom Domain on Strikingly
- Step 2: Find Your Registrar's DNS setting
- Step 3: Clean up your DNS records
- Step 4: Add a CNAME record
- Step 5: Add an A record
- Step 6: Confirm your setup is complete
Step 1: Connect to Your Custom Domain on Strikingly
-
Go to your Strikingly site editor, and click SETTINGS > Domains.
-
Enter your custom domain in the "Connect a Domain You Already Own" box, such as “yourdomain.com". (without https:// or http:// or /).
-
Click UPDATE.
-
Choose OVH as your domain provider and click “Read Tutorial".
- You will see a popup that displays the records you'll need to set in your domain settings.
Step 2: Find Your Registrar's DNS settings
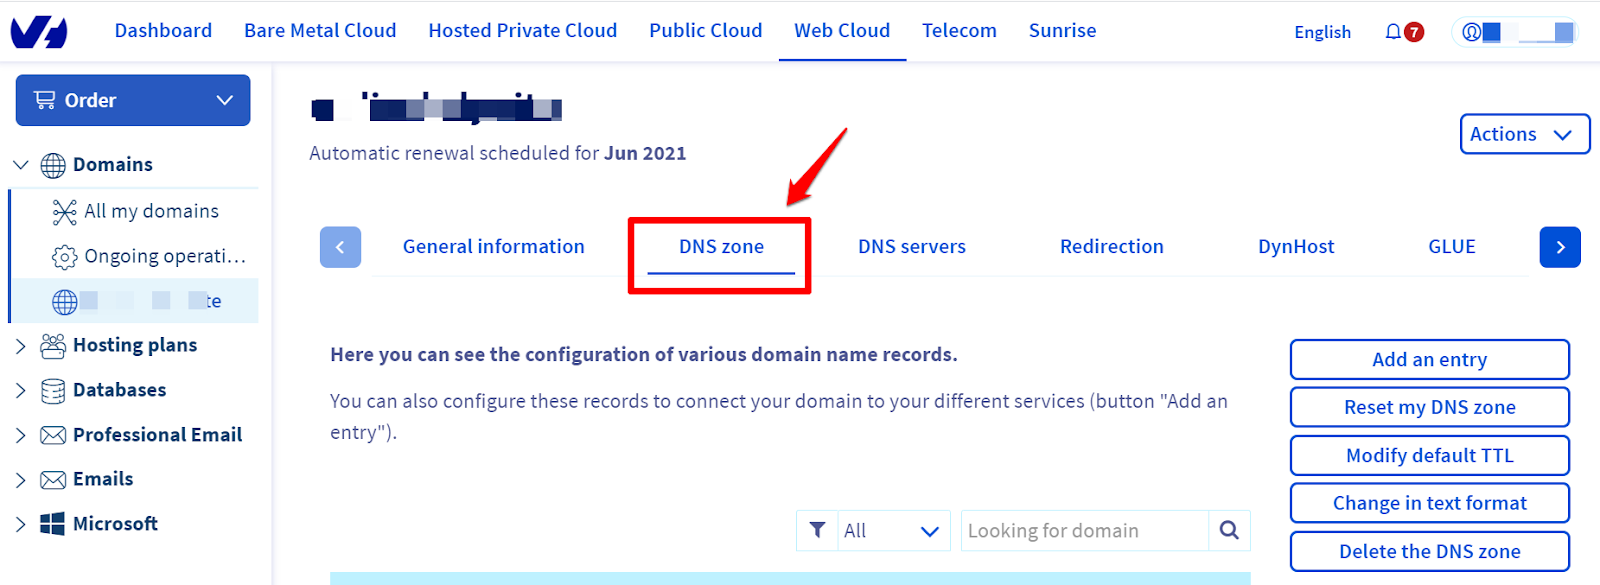
- Sign in to your OVH account.
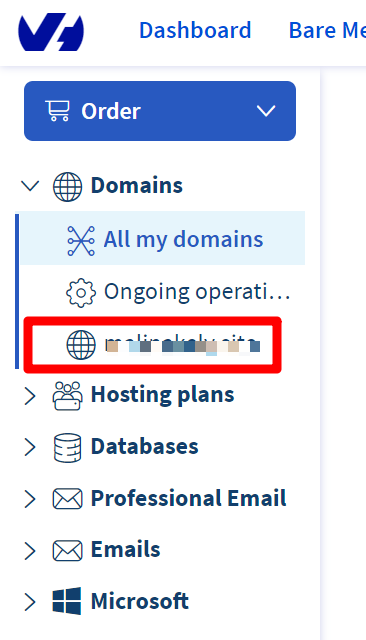
- Click "Web Cloud" from the navigation.
- Find your domain from the left sidebar under the "Domains" section.
- Click "DNS zone".
Step 3: Clean up your DNS records
- Look for the following DNS records:
- Any A type records with the domain of your root domain.
- Any CNAME records with the domain of your www domain.
- Any TXT records with the domain of your www domain or root domain.
- Select the above records and delete them.


Step 4: Add a CNAME record
-
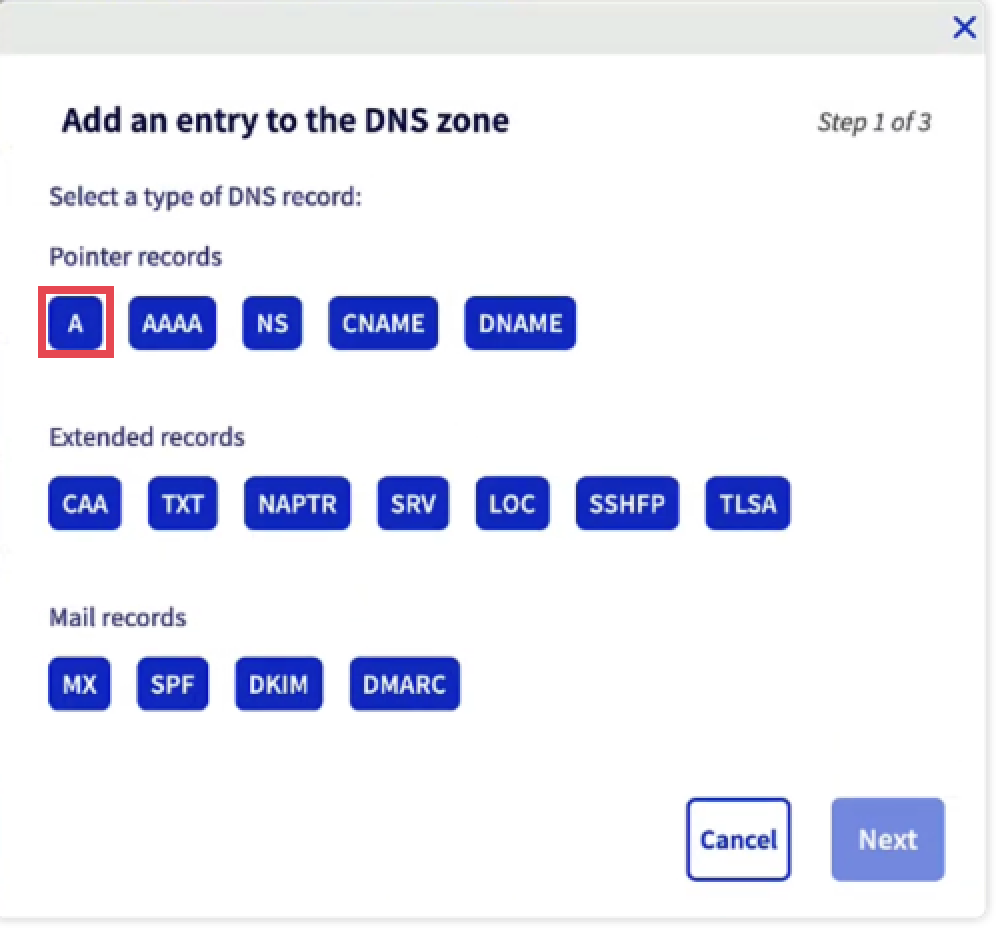
Click Add an entry.
-
Choose CNAME type.
-
Copy the relevant information from Strikingly and paste it into the corresponding places, as shown in the image below.


Step 5: Add an A record
-
Click Add an entry.
-
Choose A type.
-
Copy the relevant information from Strikingly and paste it into the corresponding places, as shown in the image below.
Step 6: Confirm your setup is complete
-
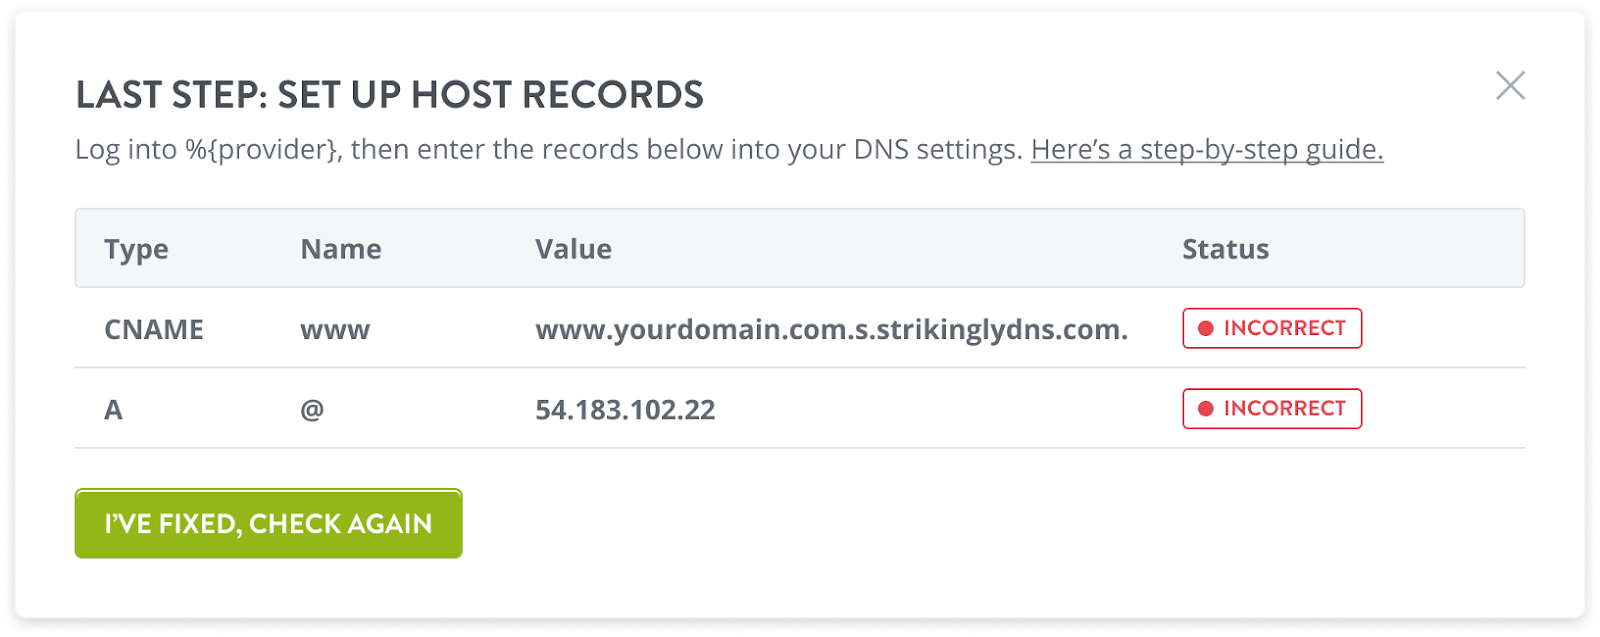
After you’ve confirmed the above setup, go back to your Strikingly site editor and click the "I've fixed, check again" button in the pop-up.
-
If you've configured your DNS settings correctly, the pop-up will close and the domain status will show as "connected".
-
If you haven't configured your DNS correctly, the popup will display the error status. You can go back to step 3 to double-check and configure the DNS records.

If your site doesn't go online after 48 hours, contact us at support@strikingly.com or chat with us and include a screenshot of your domain settings, so we can help!