
This guide walks you through connecting your subdomain to your Strikingly site. If your domain doesn't start with "www.", such as shop.example.com or blog.example.com, this tutorial is for you.
- If you're connecting a domain that starts with "www.", you can visit Connecting Domains to Your Strikingly Site.
- You can send this tutorial to your registrar’s support team if you need any help. Or, contact us anytime for additional help.
Catalog
- Step 1: Connect to Your Custom Domain on Strikingly
- Step 2: Find Your Registrar's DNS settings
- Step 3: Clean up your DNS records
- Step 4: Add a CNAME record
- Step 5: Confirm your setup is complete
Step 1: Connect to Your Custom Domain on Strikingly
- Go to your Strikingly site editor, click SETTINGS > Domains.
-
Enter your custom domain in the "Custom Domain/Subdomain" box, such as "shop.yourdomain.com". (without https:// or http:// or /).
-
Click UPDATE.
-
Choose Bluehost as your domain provider and click “Read Tutorial".
- You will see a popup that displays the records you'll need to set in your domain settings.


Step 2: Find Your Registrar's DNS settings
- Sign in to your Bluehost account.
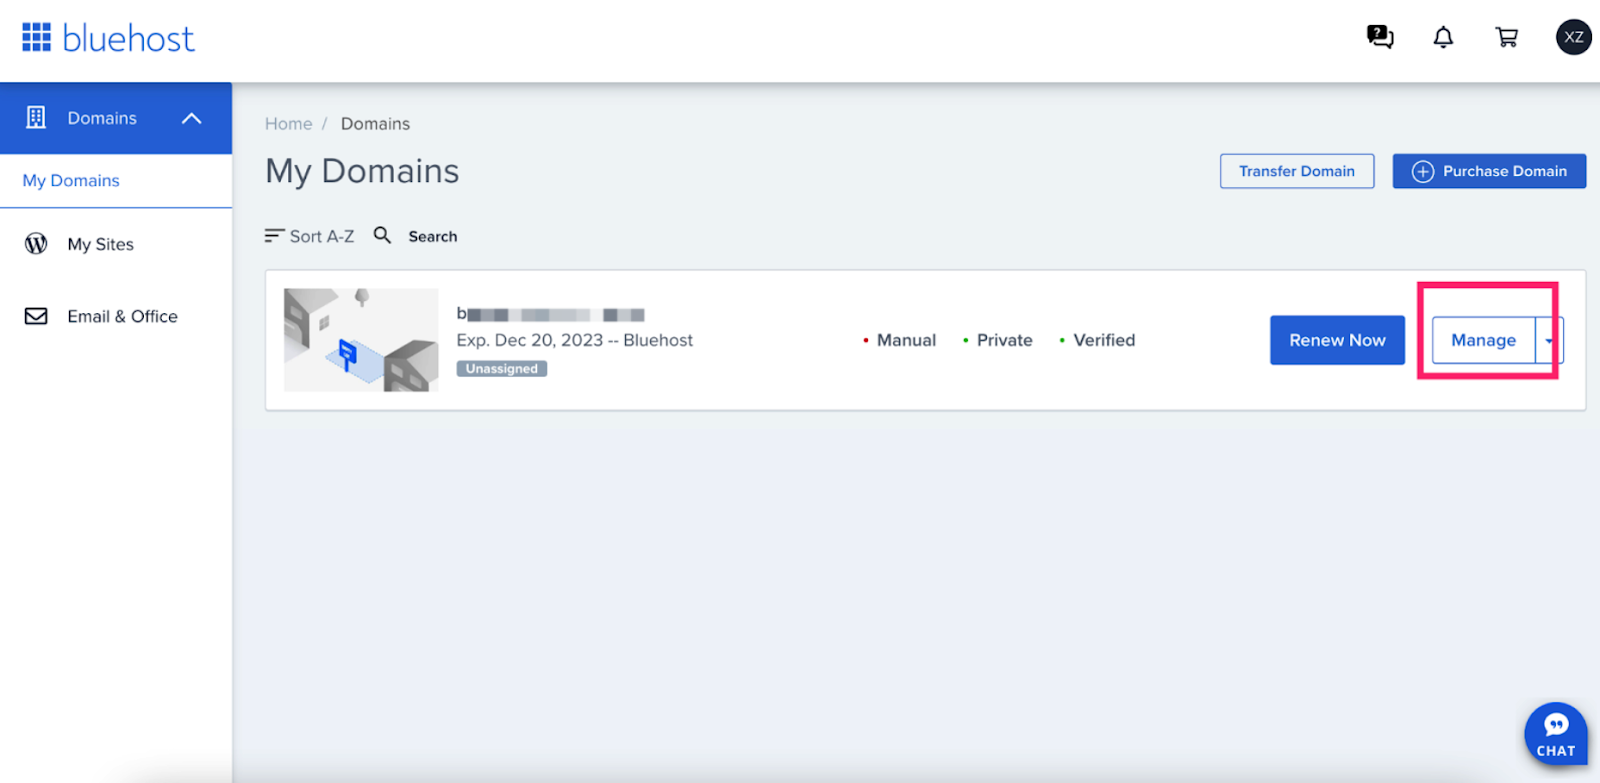
- On the sidebar panel, click My Domains.
- Click “Manage” button.
- Click "DNS" tab.


Step 3: Clean up your DNS records
- Look at CNAME(Alias) section. Try to find the record whose host record is equal to your host name and delete it.
- Click the three-dots button inline with the record.
- Click Remove to delete this record.
- Click the three-dots button inline with the record.


Step 4: Add a CNAME record
- Look at CNAME(Alias) section and click Add Record
- Copy the relevant information from Strikingly and paste it into the corresponding places, as shown in the image below.


Step 5: Confirm your setup is complete
- After you’ve confirmed the above setup, go back to your Strikingly site editor and click the "I've fixed, check again" button in the pop-up.
- If you've configured your DNS settings correctly, the pop-up will close and the domain status will show as "connected".
- If you haven't configured your DNS correctly, the popup will display the error status, and you should go back to step 3 to reconfigure the DNS records correctly.


Take note that any DNS changes may take within 24–48 hours to update. Make sure to monitor the DNS records to ensure it updates correctly.